Setting up an email address in Microsoft Outlook can be done in just a few steps on your computer.
Before you start configuring Outlook, make sure to first create an email address in your hosting cPanel. You can follow the instructions here: How to create an email address on hosting.
Step 1: Enter the email address
Enter your email address in the Email address field.
After entering the email address, click Continue.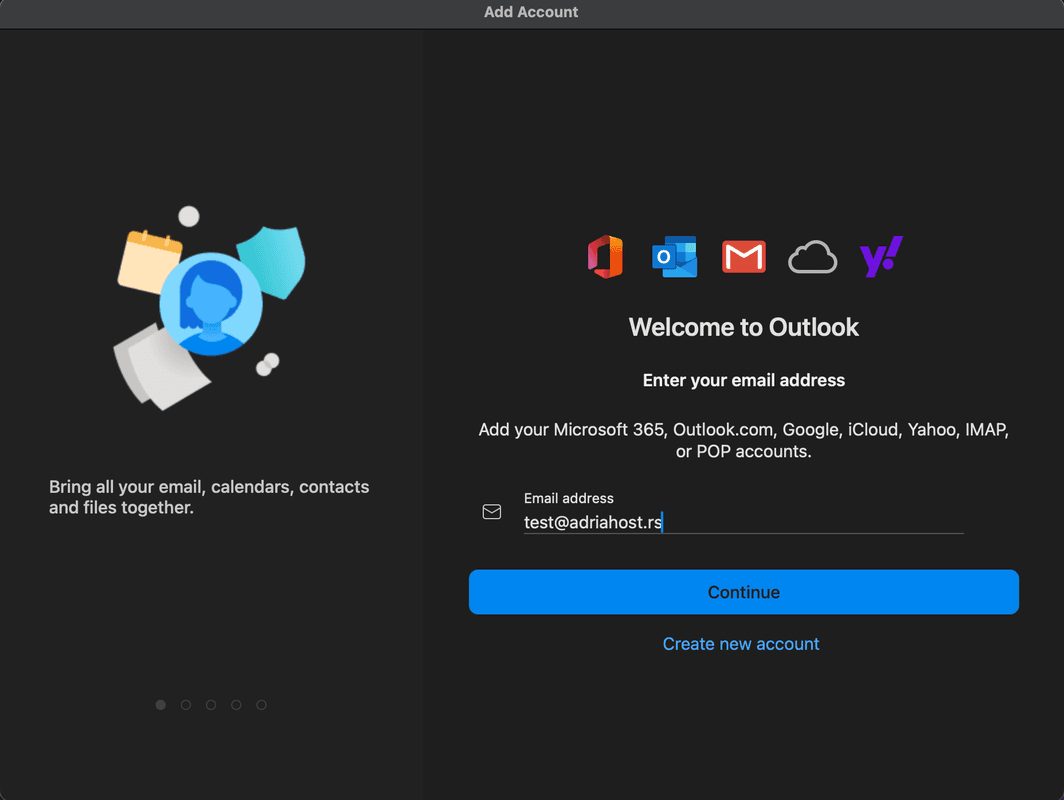
Step 2: Select Manual Setup (IMAP)
On the screen, Outlook offers you the option to log in and synchronize emails via Microsoft Cloud services. Since you want manual setup, select the Sync directly with IMAP option below the Sign in button.
Click Sync directly with IMAP to continue with the manual setup.
Note: If you click Not IMAP?
If you click the Not IMAP? option in the previous step, a screen will appear where you can choose different account types.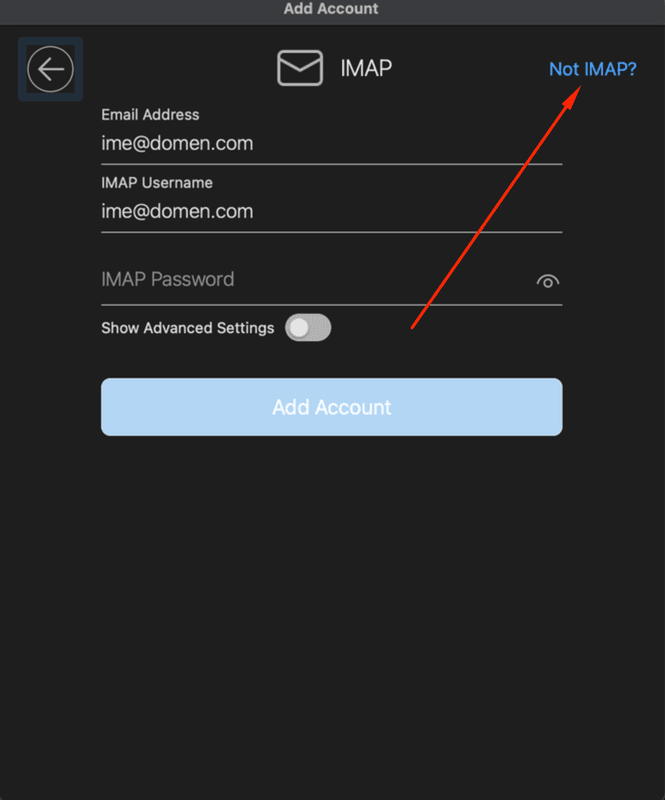
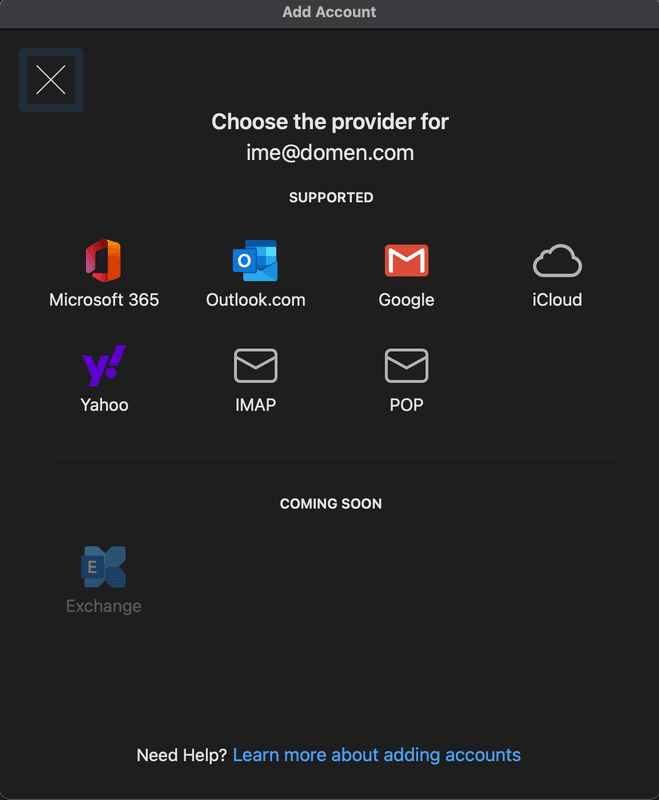
Select Account Type
-
IMAP or POP: choose one of these options:
- IMAP: Suitable for synchronizing emails across multiple devices.
- POP: Used for local email download without synchronization.
-
After selecting the account type (IMAP is recommended if you are unsure), you will be directed to the next screen where you will enter the necessary server and access information.
Step 3: Enter Basic Information for the IMAP Account
On this screen, enter the following:
- Email Address: Enter the full email address.
- IMAP Username: This is the full email address.
- IMAP Password: Enter the password for your email account.
If you want to enter advanced settings, enable the Show Advanced Settings option.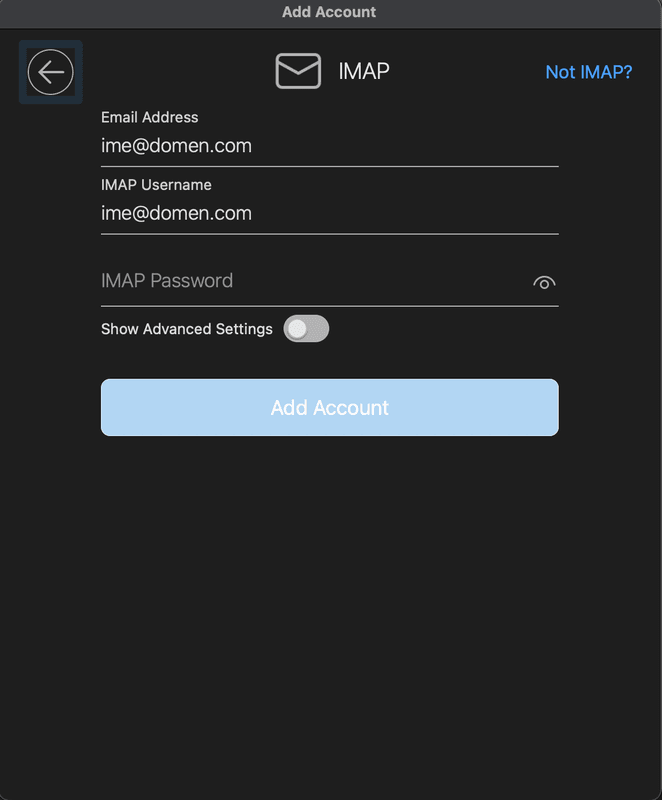
Step 4: Enter Advanced Settings
When you enable Show Advanced Settings, enter the email account and password created in your cPanel.
In the fields for incoming mail server and outgoing mail server, enter mail.yourdomain.com
Important: Replace yourdomain.com with your domain name where the email address was created.
If you are using IMAP, use these port numbers:
IMAP Incoming Server Port: 993
SMTP Outgoing Server Port: 465
If you are using POP3, use these port numbers:
POP3 Incoming Server Port: 995
SMTP Outgoing Server Port: 465
For encryption, be sure to select the Use SSL to connect (recommended) option.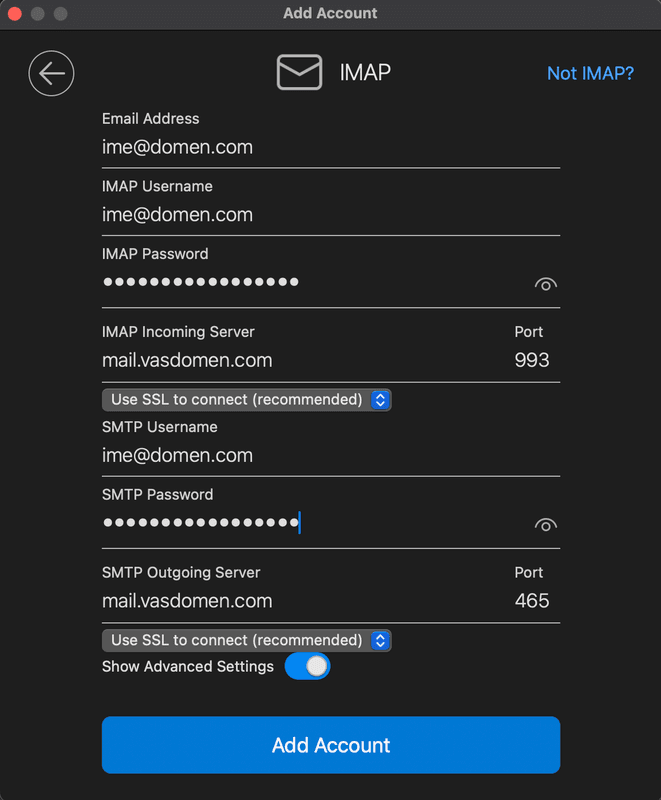
Step 5: Add Account
Once you have entered all required information, click Add Account. Outlook will try to connect to the server and synchronize the email account.
Step 6: Confirmation of Successful Account Addition
Once your email account is successfully added, you will see a screen with the message IMAP account has been added.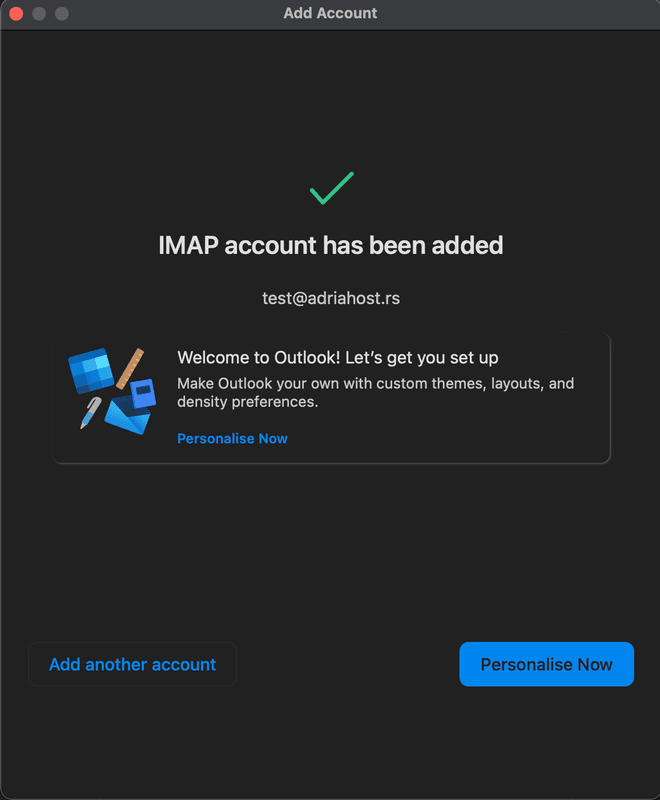
On this screen, you have two options:
- Personalise Now: Click this button if you want to customize the Outlook appearance (themes, layout, and other preferences).
- Add another account: Click this button if you want to add another email account.
Your account is now successfully set up, and you can start using Outlook to send and receive emails.


