You can change MX entry for your domain in cPanel. This change is necessary if you want to have a site on our server, while E-mail traffic works via another server/service provider.
MX record says to all mail-servers on the Internet where is your mail-server.
Changing your MX records is important for the use of the G-Suite (Google Suite) services, Zoho Mail and any other mail service that is not on our server or on the server where your cPanel.
Instructions to change MX record:
1. Log into cPanel. To log into cPanel go to your-site.com/cpanel
2. In the search field, type MX. Click on the Zone Editor application that will appear in search results.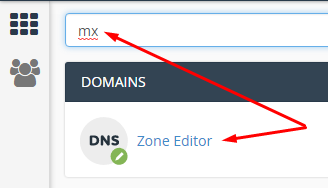
3. It will open Zone Editor application where you can see all your domains in cPanel and where you can manage the DNS zones on domain. If you have not committed the changes (deletion) in the DNS zones, here you can see the default MX record. To edit or delete it and add a new one, you need to click on the option Manage.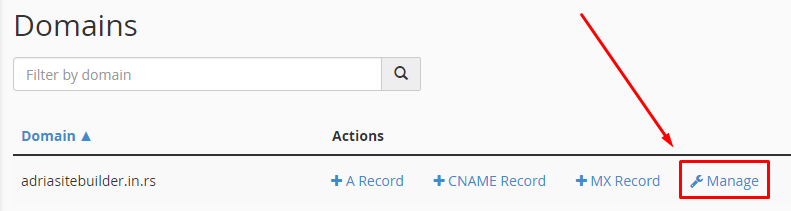
Pay attention and choose the correct Manage option next to the domain for which you change the MX record. If you mistakenly change the record for another domain, e-mail traffic to that domain will stop working.
4. Now, you can see all DNS records for the selected domain. Filter records by clicking on the MX filter: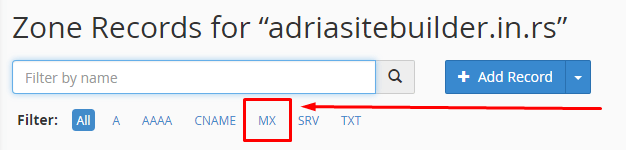
5. The default settings are as shown below. Priority 0 (zero) means that the delivery of emails takes place on the local server where is a mail server too, and Destination indicates the the location of that server. 0 (zero) has the highest priority, and always indicates the local server, the higher values (1 or more) indicate a lower priority and usually are for remote servers.
You can edit or delete an existing entry by clicking on Edit or Delete.
6. If you only modify this entry, click Edit witch will open settings where you need to enter Priority and Destination. To save the settings after entering, just click on Submit.
7. Each additional MX record (sometimes it is necessary to add 4, 5 or 6 entries for the same service), you can add with a click on the drop-down menu (click on the small triangle) on the button Add Record. In the drop-down menu, select Add MX Record.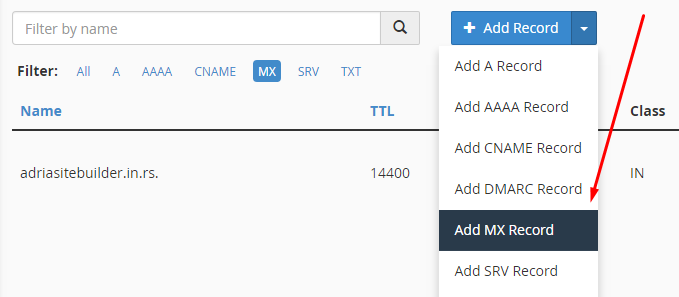
8. This will open a a form to add a new record. Enter Priority and Destionation parameters and click Add Record to add a new record.
Note:
Keep in mind that it takes 2-4 hours (sometimes up to 24) in order to the change was registered by Internet providers. Depending on the internet service providers, domain propagation can take up to 24 hours.
Instructions for changing the MX record on older versions of cPanel (this method will soon be obsolete):
- Log in to your cPanel.
- Click on the icon MX Entry.
- Choose your domain name for which you want to change your MX record.
- Under "Add new record", enter the Destination mail.your-mail-server.com value. Priority will remain 0 [zero].
- Click on "Add New Record" button.