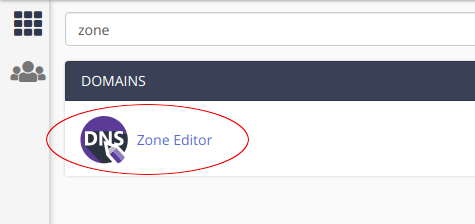
Adding a new domain zone record can be done independently in your cPanel. You need to log into your cPanel and in the search field, type the DNS. Then click on the Zone Editor application:
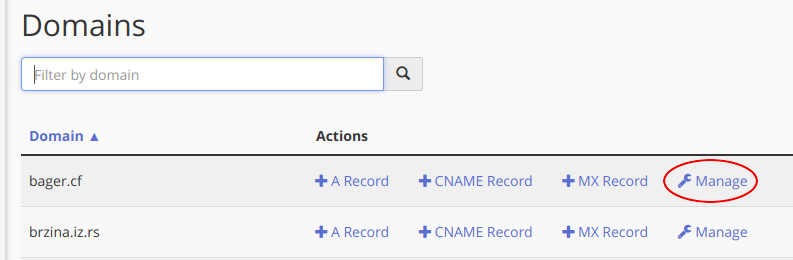
If you have multiple domains in cPanel, make sure to select the domain for which you need to enter the new DNS record and click on Manage to manage the zone records on that domain:
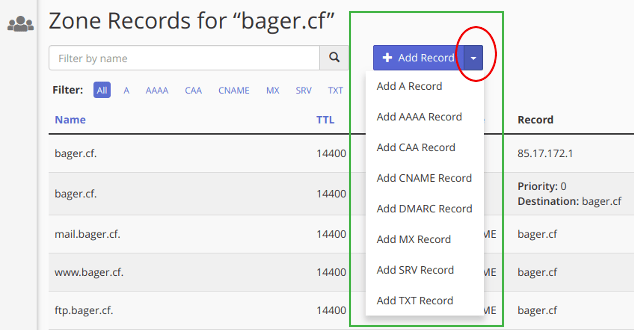
This will open the display of all existing zones, and you can add a new zone by clicking Add Record or by clicking the drop-down menu (triangle icon) and selecting the type of DNS record to add here:
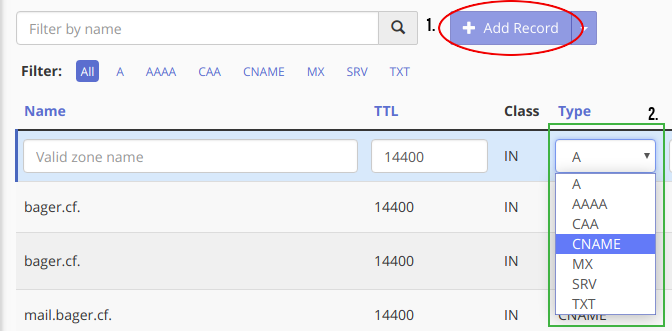
If you just click Add Record, a new field will open, where you can again select the appropriate type of record in the column Type:
If you just click Add Record, a new field will open, where you can again select the appropriate type of record in the column Type:
In the new field to add a DNS zone - record, you need to enter new parameters that you received from us or from the remote service (for example, G-Suite) for which you add a zone record:

To add a new record it is necessary to select and set the following:
To add a new record it is necessary to select and set the following:
- Name - Name of the record. it is necessary to complete the domain name with point. For example: record.mydomain.com.
- TTL - time to live - time in seconds that other DNS servers are used to store data about the domain record. After the expiry of this period, the servers again updated the information contained in the DNS record of the domain.
- Type - selected record type:
- A - IPv4 address
- AAAA - IPv6 address
- CNAME - "Canonical Name". The value of domain name (alias) that directs the record. Example: newdomain.tld
- SRV - The record that is used for specific services in the domain
- TXT - Text entry that is used for email authentication (DKIM, SPF) or other textual data available to other name servers on the Internet.
- Record - The value of the selected type of record.
Once you enter the required information you can save it by clicking on the add button Add Record. Keep in mind that it may take 2-4 hours to all Internet providers noted this change. Depending on the internet service provider, the period of registration can take up to 24-48 hours.
2. Editing an existing DNS domain record
The existing DNS record for the particular domain can change independently within your cPanel. You need to log into your cPanel and in the search field, type the DNS. Then click on the Zone Editor application:
Right then in the next screen, click Manage next to the domain for which you need to change the DNS record for a particular zone. Pay attention here, because if you have multiple domains and change the zone to the wrong domain, this can lead to problems in the work of the site or certain services on the domain.
In the table you can now see all the existing zones for the selected domain. To edit an existing zone, find it in the table and click on the Edit option, and in case you want to delete a specific zone you have and the Delete option (use it only if you are sure that it needs to be deleted):

Fields with existing records that you can edit will open. Instructions and modification parameters are provided by us (to use our services) or by external service (eg G-Suite):

After changes to existing records, to save the settings, click Save Record. Keep in mind that it may take 2-4 hours to all Internet providers noted this change. Depending on the internet service provider, the period of registration can take up to 24-48 hours.